


Spinach artichoke dip is a warm, cheesy crowd-pleaser that everyone loves. It’s irresistibly creamy and the kind of dip that keeps people coming back for more! Serve with crackers, baguette slices, or crisp veggies!
Buttery Brioche Rolls
Buttery, soft, and golden, these brioche rolls are everything you look for in a dinner roll. They are also easy to make ahead!
The post Buttery Brioche Rolls appeared first on The Stay At Home Chef.
Winter Salad

You know that moment when you’re halfway through winter and your body just starts begging for something fresh, bright, and alive? Yeah, that’s where this Winter Salad with cabbage and Brussels sprouts comes in.

Winter Salad
I fell for Ina Garten’s winter slaw years ago (because of course I did. She makes slaw an event!), but I’ve since tweaked it into something that fits me a little better: this salad is punchy, colorful, crisp, and just chaotic enough to feel alive while surrounded by snow.
I can’t stop making this.

What makes this winter salad so brilliant, is that it doesn’t pretend to be summer. It’s a celebration of what’s actually in season, cabbage, Brussels sprouts, and cranberries. The texture? Deliriously crunchy. The flavor? Sharp but balanced.
I figured I’d like this salad, but it turns out that I really, really LOVE this salad. I made it, tasted it, and proceeded to eat it for lunch alongside my infamous grilled cheese sandwich for the next 3 days. It’s so dang tasty.

What I love most about this recipe is that it lasts. You can make a giant bowl of it on Sunday and still be crunching happily on Wednesday. It actually gets better in the fridge because the flavors continue to develop.
It’s the salad equivalent of a long-term relationship. Yeah, it was great at the start. But, when you get to the point that you’re finishing each other’s sentences? That’s the dream. So, say yes to these crunchy greens, and let lettuce wilt for someone else this week.
The secret to this salad is in the dressing. It takes just a minute to whisk together a fresh vinaigrette that is bright and lemony. And, (bonus!) lemons are at peak ripeness in the winter. So, skip the overly sweet, heavy mayo-based dressings for this. This salad dressing wakes you up!

Winter Slaw
In this salad, I keep the Parmesan cheese from the Ina Garten winter slaw that I have come to love. But, for crunch? I like to use red and green cabbage, and thinly sliced Brussels sprouts (massage it all together just enough to make it pay attention). Then, for some sweetness, I sprinkle on some dried cranberries.
There’s something deeply psychological about eating a dish like this in winter. It’s almost like therapy for me. I am reminded that even when the world feels cold and gray, there’s brightness around me. It’s a little signal that life still tastes good. And that’s what this salad delivers.

Cabbage Salads and Slaws
If you’re here in cabbage season, then I’ve got all the cabbage salads and slaws you could ever want. So, give in to the crunch with this sweet and tangy, super crunchy Asian ramen noodle salad. I don’t call my recipes the best very often. But, this one is incredible.
And, this Mexican street corn coleslaw is the best of both sides of the border, with crunchy green cabbage, fresh corn, and red onions in creamy, spicy sauce with cotija cheese. For a sweeter option, check out my cranberry apple coleslaw, it’s great year-round.
This old fashioned coleslaw is a tangy, sweet, and crunchy slaw with a vinegar and oil-based dressing that will keep you coming back for more. And if you prefer a creamier option, try a classic Memphis coleslaw. With just a hint of sweetness and a subtle tang, this one will convert even the most diehard opponent of coleslaw.

Winter Salad
Bring brightness back to winter with this fresh, crunchy Winter Salad. Seasonal vegetables make all the difference!
Servings 8
Calories 292kcal
Ingredients
- ½ small head of green cabbage shredded very thin and roughly chopped, about 6 cups
- ¼ small head purple cabbage shredded very thin and roughly chopped, about 3 cups
- ½ pound Brussels sprouts trimmed and shredded very thin
- ½ cup quality olive oil
- ¼ cup freshly squeezed lemon juice about 2 lemons worth
- 1 tablespoon white sugar
- 1 teaspoon kosher salt adjust to taste
- ½ teaspoon freshly ground black pepper adjust to taste
- 1 cup dried cranberries
- 6 ounces Parmesan cheese shaved into big shards, about ⅔ cup
Instructions
-
Place the cabbage and Brussels sprouts in a bowl and set aside. Combine the lemon juice, olive oil, sugar, salt, and pepper in a small jar and shake to combine.
-
Pour about half the dressing on the salad, just enough to moisten it, and toss to coat. Reserve the remaining dressing.
-
Add the dried cranberries and Parmesan to the salad and toss carefully to avoid breaking up the cheese. Add more vinaigrette, if necessary, taste the salad, and adjust the salt if desired. Serve the slaw cold or at room temperature.
Nutrition
Calories: 292kcal | Carbohydrates: 23g | Protein: 10g | Fat: 19g | Saturated Fat: 5g | Polyunsaturated Fat: 2g | Monounsaturated Fat: 12g | Cholesterol: 14mg | Sodium: 657mg | Potassium: 308mg | Fiber: 4g | Sugar: 16g | Vitamin A: 730IU | Vitamin C: 63mg | Calcium: 302mg | Iron: 1mg

The post Winter Salad appeared first on Barefeet in the Kitchen.
Chubby Hubby Peanut Butter Bars


You know those desserts that disappear before you’ve even had a chance to sit down? Yep, these Chubby Hubby Peanut Butter Bars are one of those! They’ve got that sweet-salty magic combo — buttery graham cracker crumbs, melty peanut butter chips, a swirl of honeyed sweetness from the condensed milk — and somehow, they just work.
They’re rich, chewy, and totally addictive in the best way. Perfect for game night, movie night, or a “just because” treat when the sweet tooth hits!
Dessert Bars: A Coping Mechanism
We had been packing our rental home for weeks, a little every single day to try to be completely ready for our move into the home we’ve been renovating. I cannot even begin to express our exhaustion. It was just like building a home with the constraints of not having spaces designed the way you would have, secret issues under walls and floors and on top of it, running two businesses, kids and all while trying to pack up our entire house to move.
One random Thursday I felt emotional, exhausted and well, hungry. I’m apparently an emotional eater. A long time ago I’d seen a recipe and it was so short I’d memorized it: 1 box of crackers, 2 cans sweetened condensed milk, chocolate chips of choice. So, on a whim I went peanut butter and cinnamon chips because they secretly go together like pb and j and the rest is history. Dessert born out of emotional instability, just the way I like it!
Why You’ll Love These Peanut Butter Bars
Quick and Easy: Made with only 6 pantry ingredients and ready in minutes!
Kid Friendly: My youngest took one bite of these easy peanut butter treats and said these were the best bars I’ve ever made.
Sweet and Salty: I’m a sucker for sweet and salty. It’s such an addicting combo and these bars hit it out of the park.
No Eggs: If you have an egg allergy or open the fridge and find that some has used the last of the eggs, have no fear! You don’t need any for this recipe.
The 6 Ingredients You’ll Need
- Graham Crackers Crumbs: Create the buttery, crunchy base that holds the bars together.
- Peanut Butter Chips: Add rich, nutty flavor and creamy texture that defines each bite.
- Cinnamon Chips: Bring a warm, cozy spice that complements the peanut butter.
- Sweetened Condensed Milk: Binds everything together while adding sweetness and a fudgy texture.
- Salt: Balances the sweetness and enhances all the other flavors.
- Powdered Sugar: Adds a touch more sweetness and fun to these irresistible bars.
How to Make Chubby Hubby Bars
- Prep: Preheat the oven and prep a 9×13 inch ban with parchment or foil and cooking spray.
- Combine: Add all the ingredients except the powdered sugar to a stand mixer and mix until well combined.
- NOTE: The batter will be very thick and sticky.
- Bake: Spread the batter evenly in the prepared pan and bake until set.
- PRO TIP: I like to plop large spoonfuls of batter all over the pan and then use a rubber spatula to smash it and smooth it out.
- Cool: Let them cool completely in the pan and then cut into the squares, then toss in powdered sugar.
FAQs
Can I Halve This Recipe?
Yes, this recipe can be halved and baked in an 8×8 or 9×9 square baking pan.
Can I Use chocolate chips?
Yes! Use any combination of baking chips you want – dark, semi-sweet, milk, butterscotch, white. We are quite obsessed with this peanut butter and cinnamon chips combination!
Can I Use Store Bought GRaham Cracker crumbs?
Yes, but I prefer to crush them myself so I can leave a few larger chunks for more texture in the bars. If you use graham cracker crumbs from the store, you’ll need 3 ¾ to 4 cups.
How to Store Them
These peanut butter dessert bars should be stored at room temperature in an airtight container. They will keep for up to a week.
Can These be frozen?
I honestly haven’t tried it yet. We never have leftovers or extras to try it! I have been reading that they freeze great. Freeze them before coating in powdered sugar. Then thaw when ready to serve and toss in powdered sugar.
🚨Warning🚨: these Chubby Hubby Peanut Butter Bars have a way of disappearing fast! Between the peanut butter, the graham crackers, and that powdered sugar, they’re basically impossible to resist. They are everything I love in a dessert — simple ingredients, quick prep, and flavors that bring everyone running to the kitchen.
More Easy Dessert Bars You’ll Love
- Scotcheroos
- Gooiest Rice Krispie Treats
- Classic Peanut Butter Bars
- Muddy Buddy Bars
- Brown Butter Dulce de Leche Rice Krispie Treats
Watch How to Make These Peanut Butter Bars…
Peanut Butter Bars
Chubby hubby peanut butter bars — buttery graham cracker crumbs, melty peanut butter chips, a swirl of honeyed sweetness from the condensed milk — and somehow, they just work.
Servings 20
Calories 272kcal
Ingredients
- 1 Box Graham Crackers 14oz, crushed
- 1 ¾ Cups Peanut Butter Chips
- ¼ Cup Cinnamon Chips
- 2 Cans Sweetened Condensed Milk 10oz each
- ½ teaspoon Salt
- 2-3 Cups Powdered Sugar
Instructions
-
Preheat oven to 350 degrees F. Line a 13×9 baking pan with parchment paper or aluminum foil then spray with cooking spray.
-
Combine graham cracker crumbs, peanut butter chips and cinnamon chips, condensed milk and salt in a large bowl and mix until well combined to make a batter. (TIP: Use a stand mixer with paddle attachment if possible because batter will be THICK.)1 Box Graham Crackers, 1 ¾ Cups Peanut Butter Chips, ¼ Cup Cinnamon Chips, 2 Cans Sweetened Condensed Milk, ½ teaspoon Salt
-
Spread batter into pan then bake at 350 degrees F for 30 minutes or until set.
-
Cool completely in pan, remove then cut into squares.
-
Roll/toss squares in powdered sugar until nicely coated. Store at room temperature in an airtight container up to one week.2-3 Cups Powdered Sugar
Video
Notes
Adapted from South Your Mouth
Nutrition
Serving: 1bar | Calories: 272kcal | Carbohydrates: 50g | Protein: 5g | Fat: 6g | Saturated Fat: 3g | Polyunsaturated Fat: 0.3g | Monounsaturated Fat: 2g | Cholesterol: 14mg | Sodium: 245mg | Potassium: 190mg | Fiber: 1g | Sugar: 39g | Vitamin A: 106IU | Vitamin C: 1mg | Calcium: 133mg | Iron: 1mg
Sugar Cookie Icing

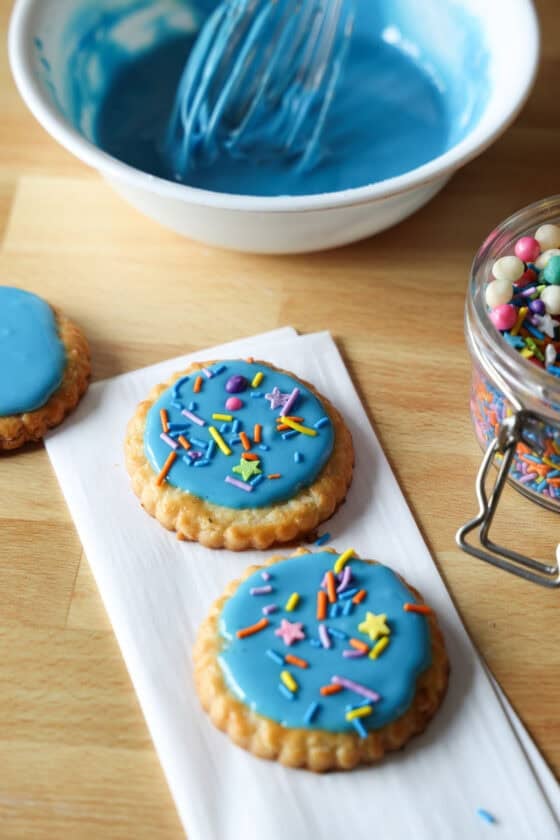
I’ll show you how to make the best icing for decorating sugar cookies! This is a simple sugar cookie icing that hardens to a smooth, shiny finish without egg whites. It’s perfect for frosting, flooding, piping, and dipping sugar cookies!
This recipe is my quick, foolproof royal icing alternative, without egg whites. It’s an easy sugar cookie icing for holidays and everyday decorating that’s great for beginners. All you need to make it is powdered sugar, corn syrup, and milk.
The Easiest Thanksgiving Side Dish with 1 Bowl and 6 Ingredients

This corn casserole is soft, fluffy, and full of sweet corn flavor. It’s a simple side dish that pairs perfectly with a holiday meal. It’s so delicious served warm, no wonder it’s a family favorite!
CRANBERRY PECAN COOKIES


These Cranberry Pecan Cookies are made with a cake mix and craisins. They are so easy and so good! ❤️WHY WE LOVE THIS RECIPE We do a lot of baking during the holiday season and we are always looking for easy recipes and these are on the list. Only 5 ingredients and so good! These…
The Best Potato Recipes

These are the best potato recipes, they’re all you’ll ever need! Potatoes are the ultimate comfort food and pair perfectly with almost any meal from a Sunday ham to Thanksgiving turkey. If you’re craving cozy scalloped potatoes or the fluffiest mashed potatoes, every one of these recipes is tried, tested, and well loved by Spend…
My Absolute FAVORITE All Butter Pie Crust Recipe


I’m a self-proclaimed pie fanatic and this easy, All Butter Pie Crust is my absolute favorite pie crust recipe! It’s super flaky, easy to make, and comes together quickly!
I’m here to teach you how to make a homemade pie crust that will be so easy, so delicious, and so flaky without any stress! Making a pie crust from scratch is one of the most intimidating recipes that a home baker will encounter. Yeast bread is almost equal, and I cannot only teach you how to make both, but I can make you an expert!
Your pie crust texture is 100% dependent on the fat that you choose to use. I’ve experimented with it all, and I’ve got a suggestion for you.
If you’re a beginner and you’ve already struggled with making a homemade pie crust recipe, let’s take a step back and make my mom’s fail-proof pie crust recipe. It is so easy and the addition of egg and vinegar along with using cold shortening makes for a really easy pie crust recipe.
However, if you’re really looking for the best pie crust recipe that’s not difficult and really brings flavor and texture, well that’s an all butter pie crust.
Ingredients in an All Butter Pie Crust
Making a flaky pie crust is one of the most basic recipes with perfectly basic ingredients:
- Flour: Forms the structure of the crust — it provides the gluten network that holds everything together while still allowing for a tender, flaky texture.
- Salt: Enhances flavor and balances the richness of the butter.
- Butter: The star of the crust! Cold butter creates steam pockets as it melts during baking, giving you that tender, flaky texture and rich buttery flavor.
- Ice Water: Brings the dough together without activating too much gluten. The cold temperature keeps the butter from melting before baking, which helps maintain flakiness.
- Sugar: I’ve found it does not sweeten the crust but does create a flakier, more golden crust.
**Keep reading to find out why I made this an all butter pie crust recipe!
How to Pick the Best Source of Fat for Your Pie Crust
There are a few different fats that you can use for a pie crust. I’ve used lard a few times, but honestly I don’t find it to be worth it. Here’s a breakdown of each fat and why I’ve settled on butter.
Using Lard in Pie Crust
- Pros: Lard produces an extremely crisp, flaky crust. Its melting point is higher than butter, so it doesn’t soften as quickly while you handle it so you can really bust out a good crust.
- Cons: I don’t like lard because it’s too darn hard to find a good quality lard. And your pie can 100% taste like whatever lard you use. No thanks.
Using Shortening in Pie Crust
I have absolutely nothing against shortening. It’s cheaper to buy than butter, so there’s that going for us. Sometimes I use both shortening and butter so that I can get in the flavor but still end up with a decorative crust.
- Pros: Shortening has a higher melting point than any other fat, so it’s easy to cut into pie dough and roll out. It’s also awesome when making any kind of decorative pie crust, because doughs made with shortening hold their shape the best during baking.
- Cons: The flavor is lacking with a shortening crust.
Using Butter in Pie Crust
Ahhhhh, the best ingredient in all the world. I love the flavor, I love the texture of the flaky crust and I love that I always have butter on hand.
- Pros: Butter has the best flavor and it forms light, flaky layers in pie crust. This comes in part from the water content of butter, which evaporates as the pie bakes and turns to steam, separating and puffing up the layers in dough. It’s a heavenly thing.
- Cons: Butter can be a bit harder to work with than shortening because it warms and melts so quickly. If your dough feels too soft? Chill it for 15 minutes. Too hard? Allow it to sit on the counter for a few minutes.
How to Make a Pie Crust From Scratch (with Photos!)
Step 1: Make sure your fat is in the refrigerator keeping chilled. Place the flour, salt and sugar in a large bowl and mix to combine.
Step 2: Quickly cut the cold butter into large chunks and add to the flour. Cut in using a pastry blender depending on what you’ve decided on above.
Step 3: Fill your measuring cup with ice and water to keep it extra cold and create a well in the center of the flour and quickly add using tablespoons and stirring together with a fork until the mixture is just starting to come together but is still very shaggy and floury.
Step 4: Place plastic wrap on the counter and dump the dough and flour bits out. Gather into a ball as best you can and wrap tightly in the plastic.
Step 5: Place in the fridge to chill again for a few minutes before using.
Tip: Do the squeeze test and if it stays in your hand the pie crust is ready even though it looks shaggy in the bowl. Also, when you form it into disks, a marble slab can help keep it cool.
Wrapping the pie dough in plastic wrap keeps the dough from drying out and allows it to chill in the fridge so that the butter isn’t melting in the crust.
Picking the Best Pie Crust for Your Pie
First, tell me what kind of filling you’re going to be making. Ahhhh, you didn’t think I’d be asking that, right? The way you make your pie crust is determined by the filling. Here’s why:
When to Make a Flaky Pie Crust
Flaky crusts are best for fruit pies, like our razzleberry pie. You want that tender, lofty flake when paired with a fruit. Flaky crusts are made by leaving the fat in larger pieces in the crust – the size of walnut halves or slightly smaller.
Why? Larger pieces of fat begin to evaporate moisture when the pie goes into the oven and the evaporation creates steam which forms air pockets in the crust, creating a flaky final texture
When to Make a Mealy Pie Crust
Mealy Crusts are best for cream or custard pies, like our French silk pie, because it won’t get soggy as the pie rests. Mealy crusts are made by mixing the butter into smaller pieces — pea-sized or smaller. Less evaporation occurs, making a tighter, firmer crust.
Here’s a great example. When making a chicken pot pie crust you would choose which kind of pie crust?
It’s not a fruit, but it’s not a custard either…
You’re right, still go with a more mealy crust because you want that sauce inside to not destroy the crust! Make sense?
Pie Crust FAQs
Should I Use an Egg Wash on This Pie Crust?
Why use an egg wash for pie crust and is it necessary? I think so! You cannot achieve that beautiful, golden, shiny crust without an egg wash.
Why is Pie Crust Too Crumbly to Roll Out?
If the crust is crumbly and hard to roll, it is too dry. Add a few sprinkles of cold water, until the dough is evenly moist. Do not handle the dough too much.
Why Does Pie Crust Shrink?
Pie crust shrinks when the dough hasn’t been “rested” long enough. Resting time allows the gluten to relax, and will play a big role in preventing shrinking.
Can You Freeze Pie Crust to be Used Later?
Yes, pie dough freezes very well. Wrap the unbaked pie crust tightly with heavy-duty aluminum foil or plastic freezer wrap, or place in a freezer bag and seal tightly. Thaw in the fridge for 2 hours before baking.
How to Crimp Pie Edges
I learned how to crimp a pie crust edge when I was growing up and because of that I haven’t really thought much of it until I needed to teach my own daughters.
To crimp the edges: Using the index knuckle or finger of one hand, push the inner edge out while pinching the outer edge in with the thumb and index finger of the other hand.
How to Blind Bake and Avoid a Soggy Pie Crust
The best ways to avoid a soggy pie crust are to blind bake with both a docking and weights method followed by an egg wash and further baking. For all the details on making a blind-bake pie crust, check out or lemon meringue pie recipe.
Tips for Making the BEST Pie Crust
- It’s crucial that all of your ingredients are super cold! Use ice water and butter that was taken straight from the fridge, otherwise your pie crust won’t turn out flaky!
- Once the ingredients have all been combined, stir just until the pie dough comes together. Do NOT overwork the dough, otherwise you’ll wind up with a dense pie crust.
- I often move my dough into the fridge after cutting in the butter and again once everything is combined just to keep it chilled.
- Place the all butter pie crust into the freezer for a few minutes before baking to avoid shrinking.
Essential Pie Baking Tools
Whether or not you’re a pie fanatic you’re going to want these few essentials to ensure your pie turns out.
- Pastry Blender: I’m a big fan of hand cutting in the fat over a food processor which can over work the dough. Look for one with a good handle and strong cutters. I prefer this OXO version.
- Silicone Baking Mat: It’s large, you don’t need extra flour which will dry out the crust and it’s got sizes on it so no ruler needed to roll out the perfect sized crust.
- Wooden Rolling Pin: I’ve always used a handled rolling pin but have recently decided that a French pin is much more my style as it’s easy to turn and smooth to roll the dough.
- Pastry Cutter: Making a lattice pie or just want a fancier edge? It’s all about this one simple tool and bonus, this one is double sided.
- The BEST Pie Dish: The gold in this pie dish will promote even baking without dark edges!
- Pastry Brush: To make a gorgeous crust you need an egg wash and this is the pastry brush I prefer.
- Pie Stamps: This is NOT essential but if the top crust makes you nervous you can stamp out cute shapes and bam, it’s beautiful!
- Pie Weights: Ditch the dried beans and buy reusable pie weights. They are a must for a blind pastry crust.
You’re never going to need another pie crust recipe again! This one is so buttery and flaky and perfect! I would almost just eat the crust plain, but why would I do that when I fill it with even more deliciousness?!
Our Favorite Pie Recipes:
- Banana Cream Pie
- Razzleberry Pie
- French Silk Pie
- Peach Pie
- Strawberry Pie
- No Bake Chocolate Pie
- Apple Pie
- Pumpkin Pie
- Blueberry Pie
- Pecan Pie
- Marionberry Pie
- All our PIE RECIPES!
Watch How This Pie Crust Comes Together…
All Butter Pie Crust
This All Butter Pie Crust is my absolute favorite pie crust recipe! It’s super flaky, easy to make, and comes together quickly!
Servings 8
Calories 348kcal
Equipment
Ingredients
- 2 ½ Cups All-Purpose Flour
- 1 teaspoon Granulated Sugar
- 1 teaspoon Salt
- 1 Cup Unsalted Butter very-cold and cut into 1/2 inch cubes (this is 2 sticks)
- 8 Tablespoons Ice Water
Instructions
-
Place the flour, sugar and salt into a bowl and mix well.2 ½ Cups All-Purpose Flour, 1 teaspoon Granulated Sugar, 1 teaspoon Salt
-
Add the butter and using a pastry cutter or two forks, mix until the butter is pea sized.1 Cup Unsalted Butter
-
Add the ice water (*see note), just a few tablespoons at a time, stirring gently with a fork until the dough is just coming together but is still crumbly. Test that the dough is ready by squeezing the dough in your hands until it holds.8 Tablespoons Ice Water
-
Smash the dough together and separate into two balls.
-
Wrap in plastic wrap and rest in the fridge for 1-2 hours or up to 2 days in advance (you’ll want to let the dough sit on the counter a good 10 minutes before rolling). **See notes for freezing.
-
Allow to sit out for a few minutes and then roll out dough as the pie recipe instructs. ***See notes for information on blind baking a pie crust.
Video
Notes
*I like to fill a glass measuring cup about half way with ice cubes and then fill the rest with water. Then I just a tablespoon to measure out the ice water into the well I created.
**Pie crust can be made ahead and frozen for up to 2 months. Allow to thaw completely on the counter before rolling
*** How to Blind Bake a Pie Crust – head to our Lemon Meringue Pie post for all the details on blind baking a crust.
Nutrition
Serving: 1g | Calories: 348kcal | Carbohydrates: 30g | Protein: 4g | Fat: 23g | Saturated Fat: 15g | Cholesterol: 61mg | Sodium: 495mg | Potassium: 49mg | Fiber: 1g | Sugar: 1g | Vitamin A: 709IU | Calcium: 13mg | Iron: 2mg
The 15-Minute Salad That Steals the Spotlight

Waldorf Salad is a delicious blend of apples, grapes, celery, raisins, and walnuts, all mixed together in a smooth and creamy dressing. It’s the perfect salad for sharing with a crowd at a picnic or potluck!